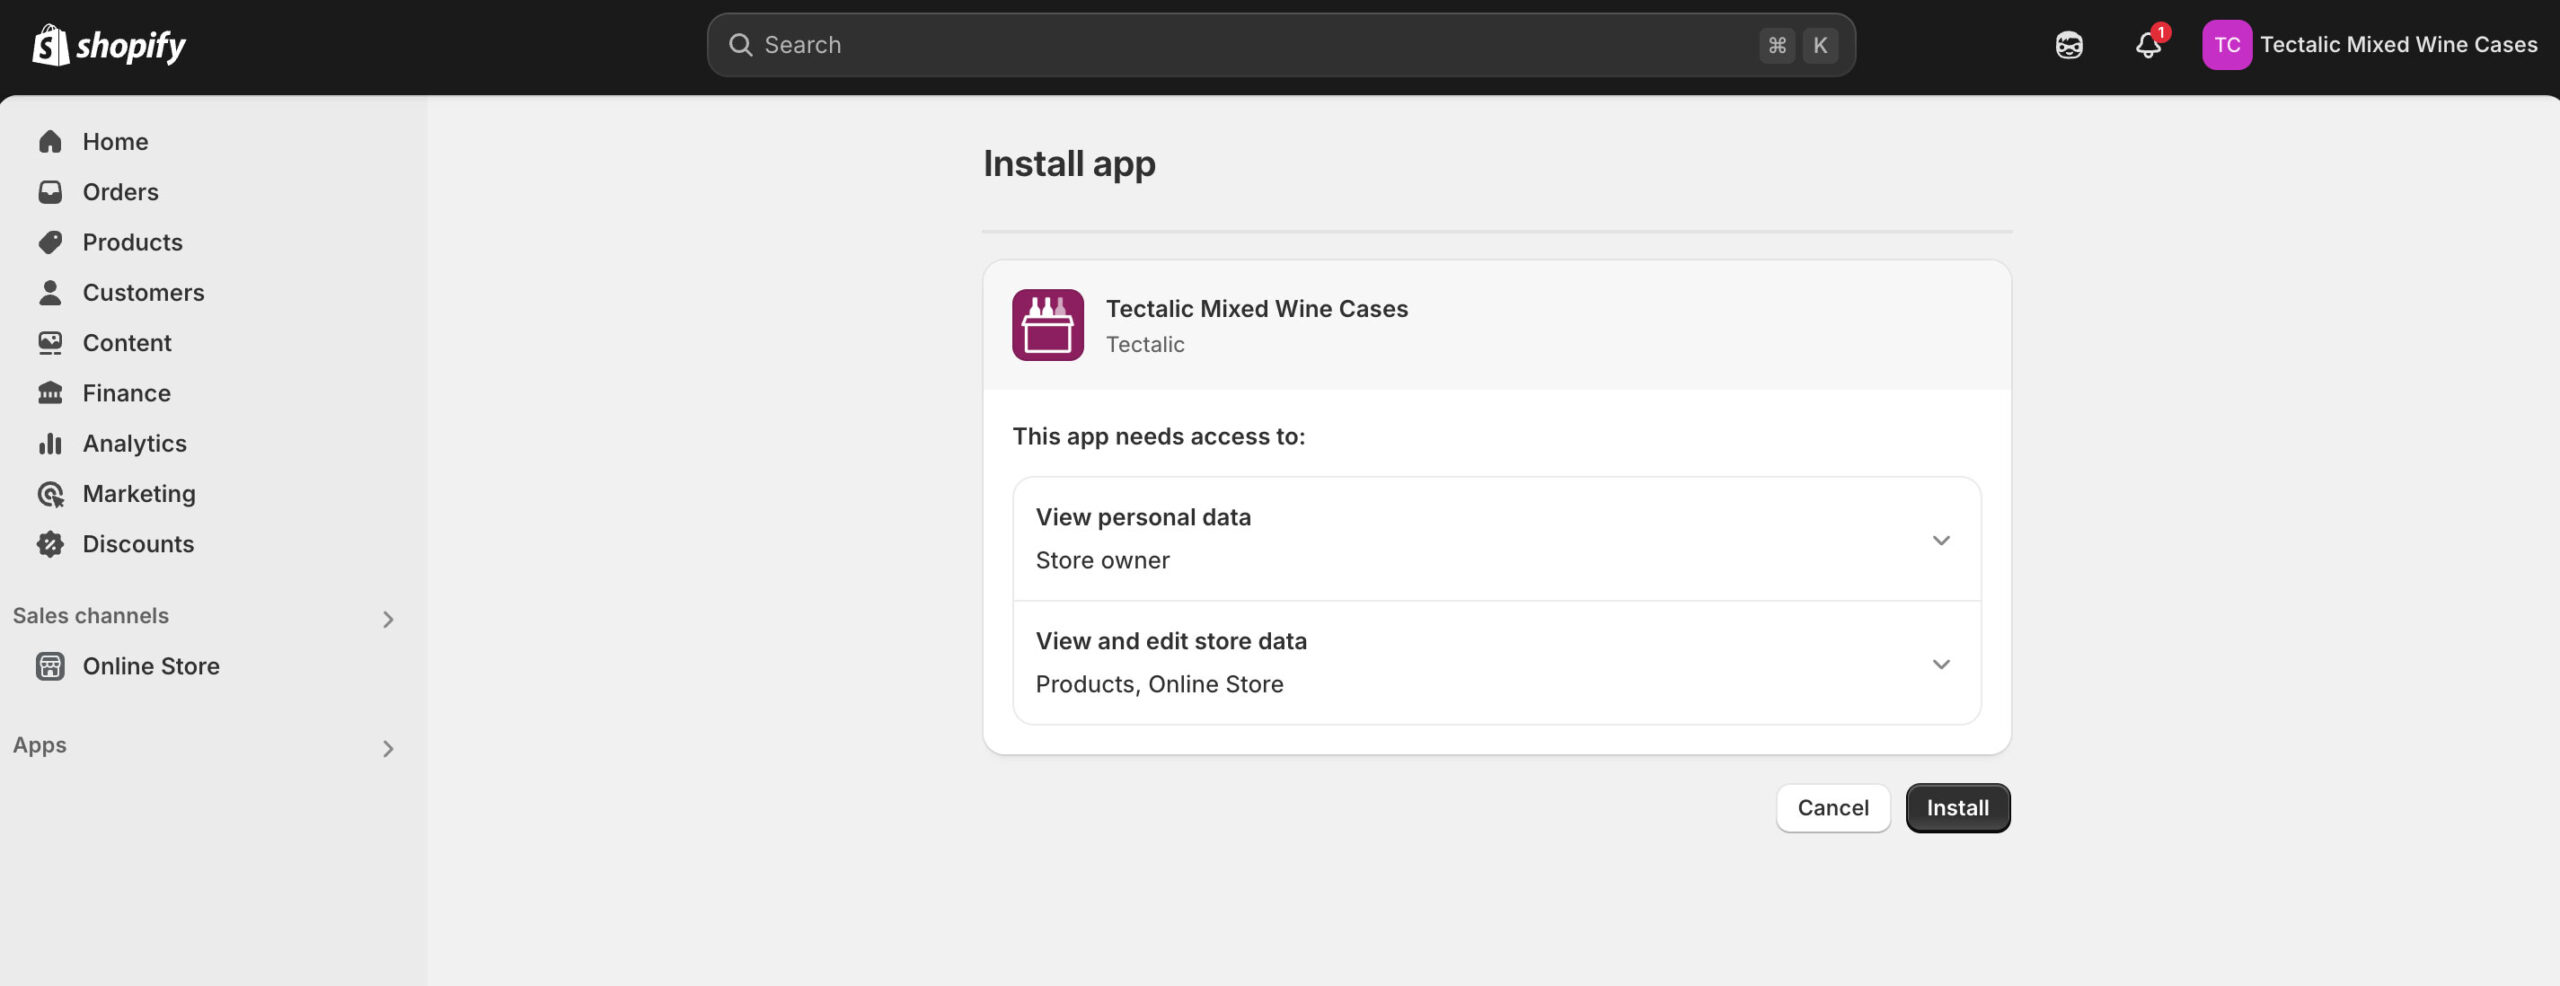
Grant access so that the app can manage your store’s products.
The app installation permissions screen
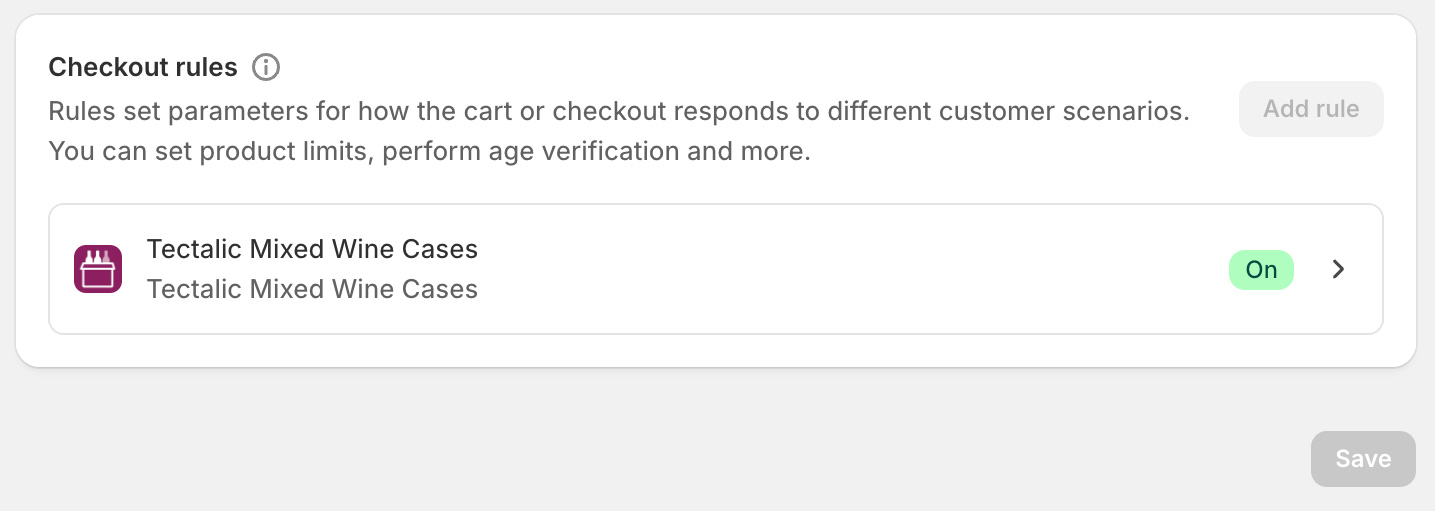
The checkout rule turned on
Step 2: Enable the Checkout Rule
The following steps ensure that customers cannot complete an order on your store without their cart contents satisfying your Mixed Cases product rules
Go to your Shopify store’s Settings screen, then click on Checkout.
Scroll to the bottom of the Settings screen to the Checkout rules section then click Add rule.
Click on the Tectalic Mixed Wine Cases validation rule, then click Save. Click Turn on.
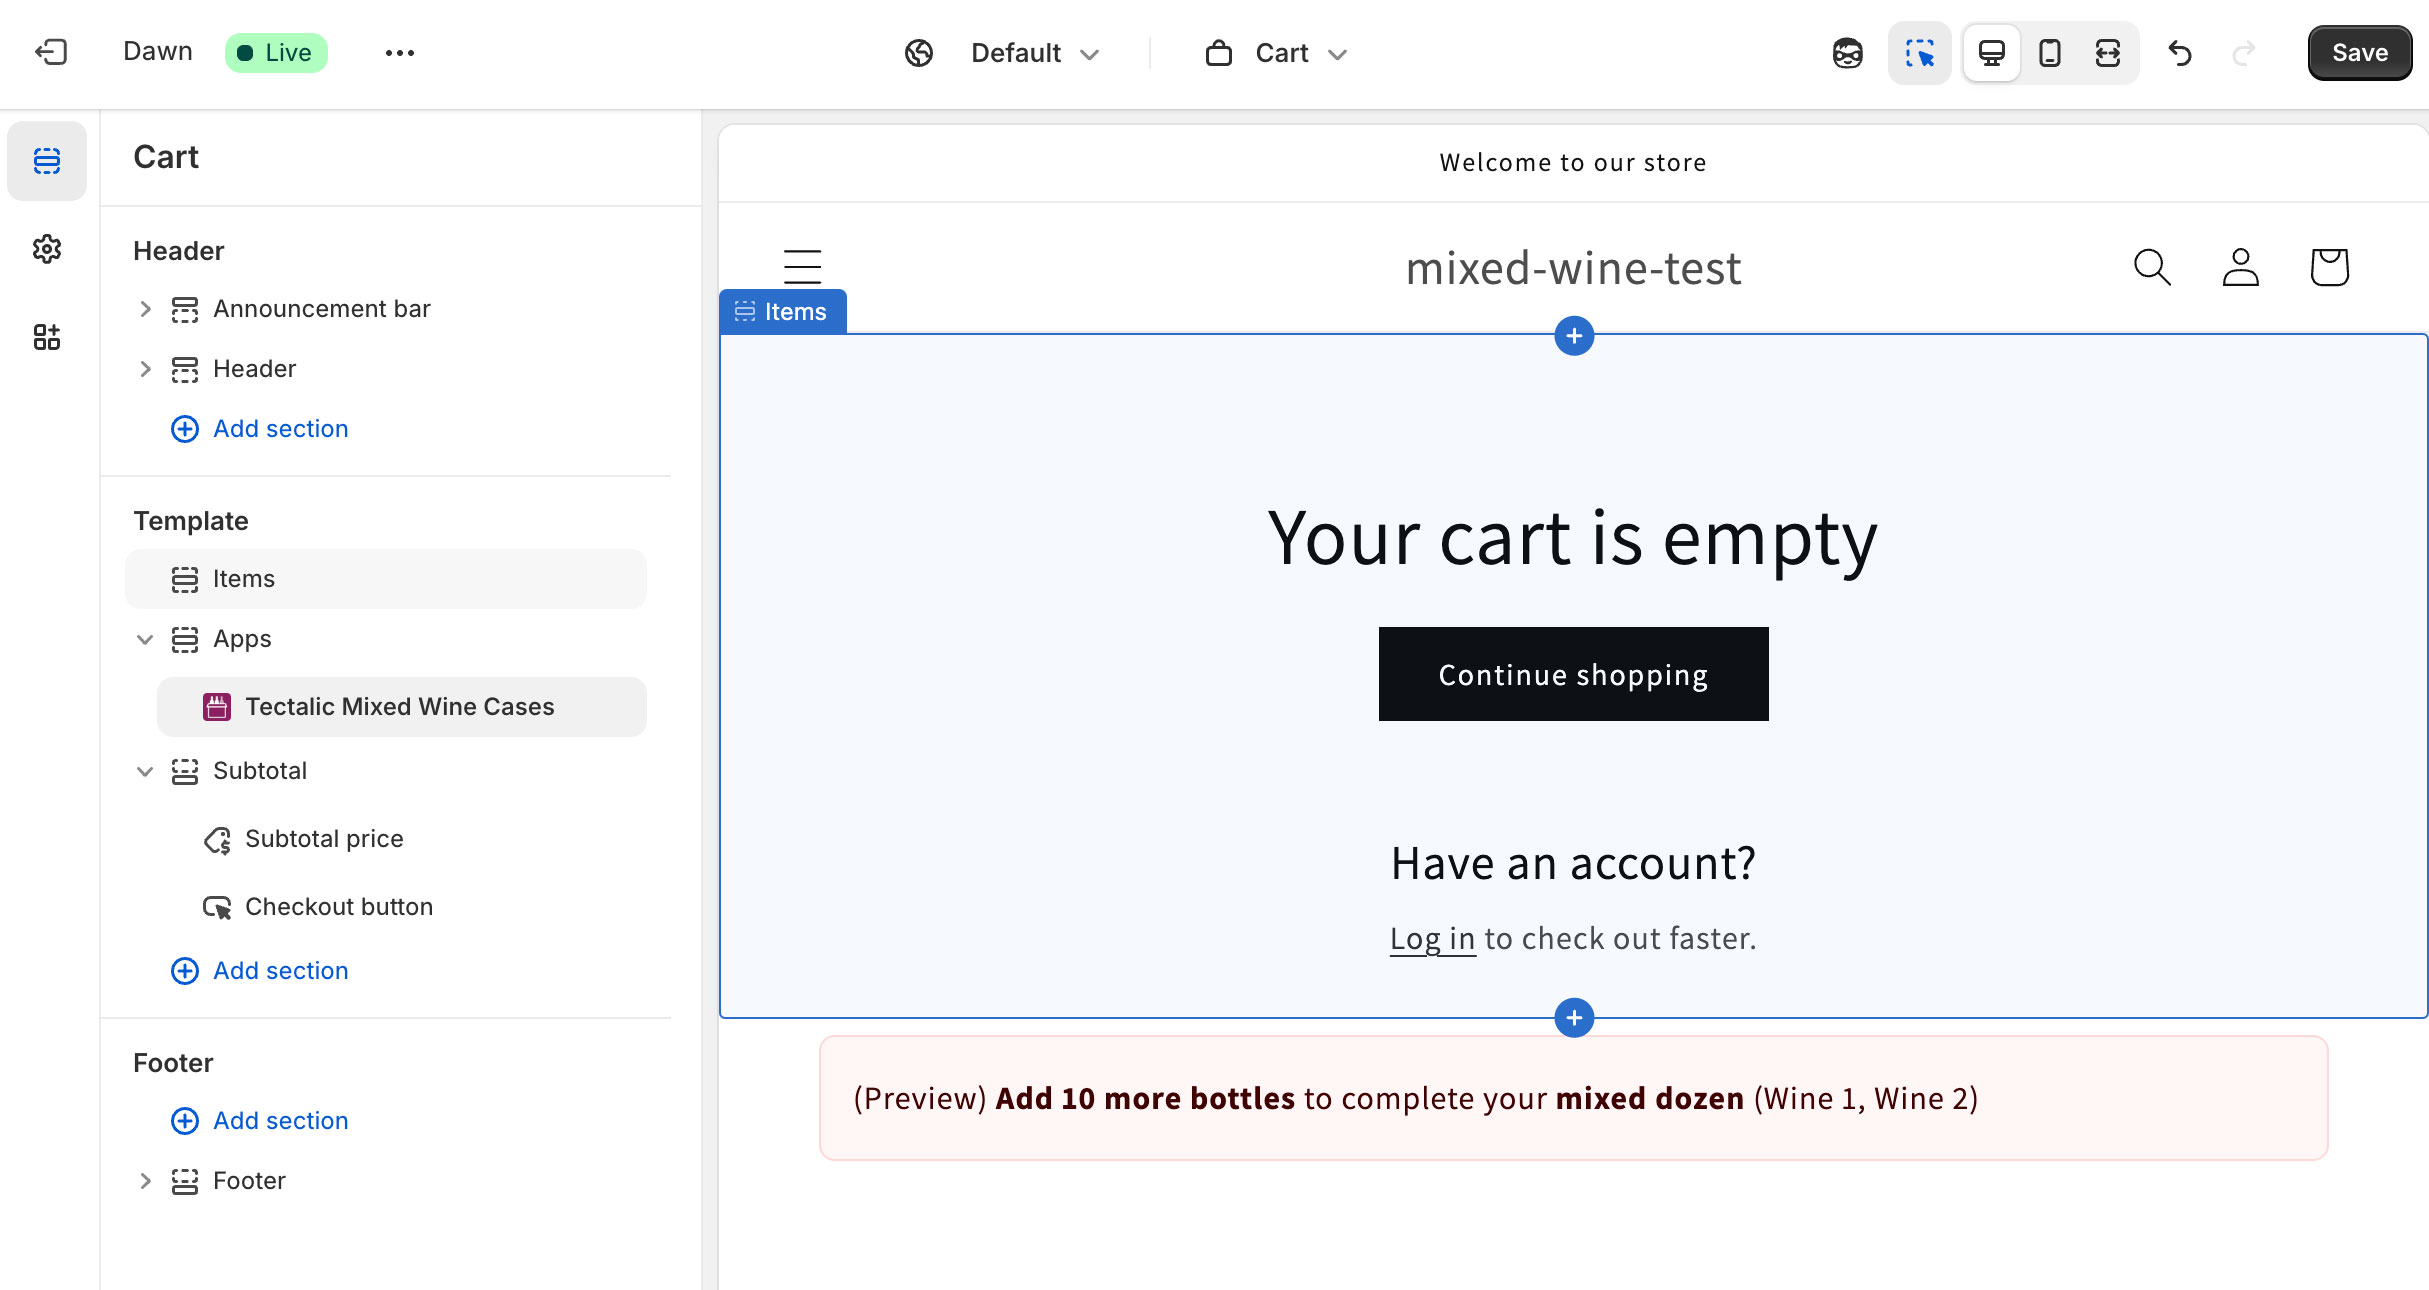
Step 3: Add the block to your cart template
The following steps allow your customer to see feedback on their cart contents whenever they visit your Cart.
In your Shopify Admin, click on Sales channels, Online Store, Themes and then click Customize.
At the top centre of your screen click on Home page, then click the Cart template.
In the left sidebar, hover under the Items template, then click the plus sign to add a new section.
Click on Apps, then Tectalic Mixed Wine Cases.
Click Save (top right of screen).
The theme editor with the Mixed Wine Cases block added to the cart template
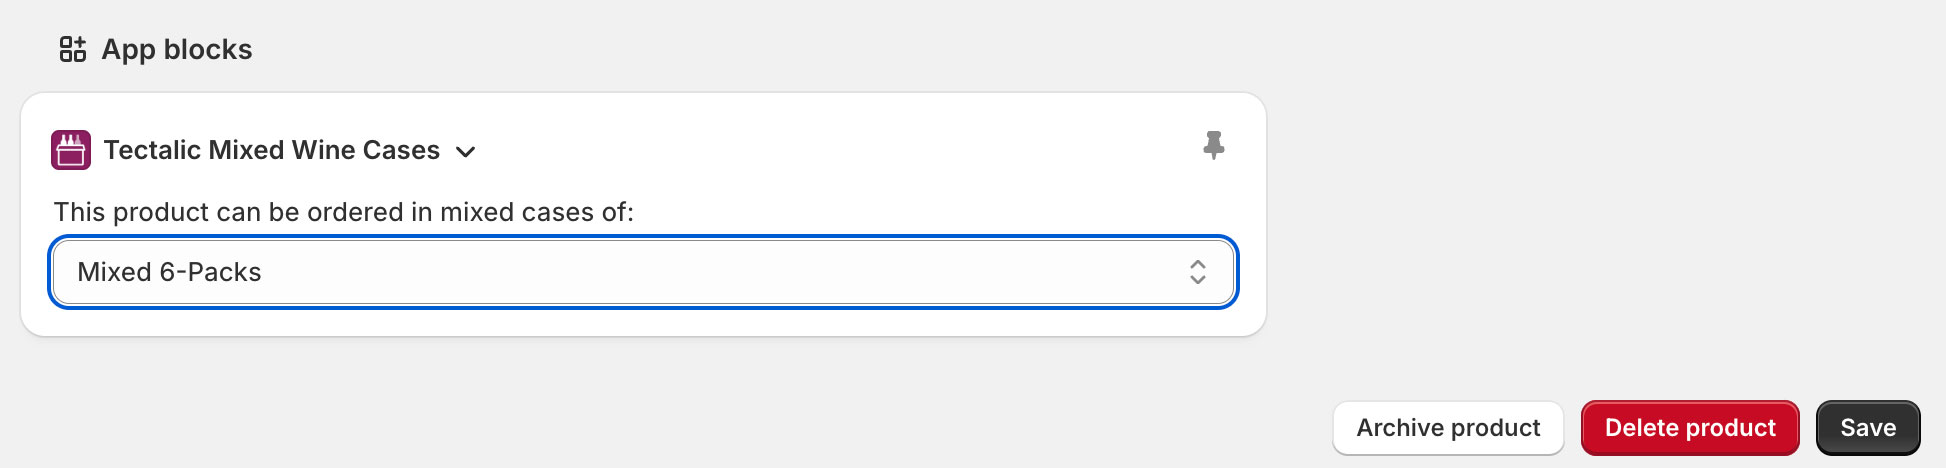
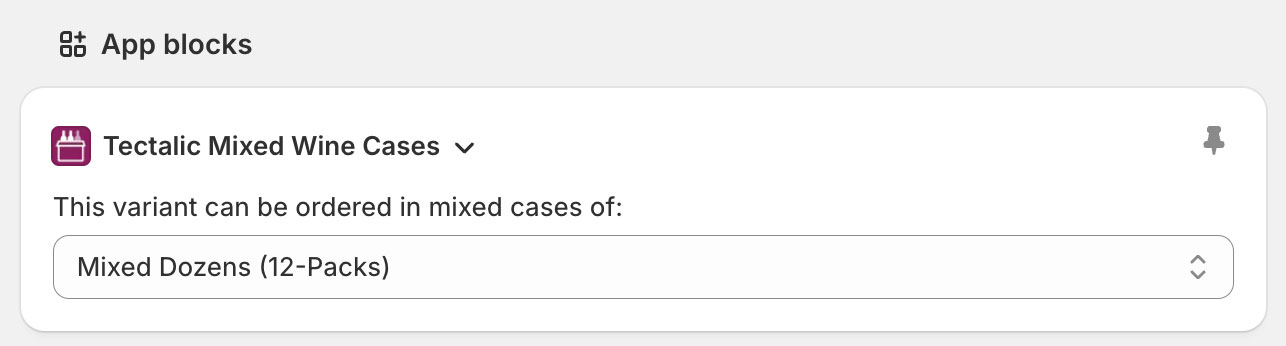
Step 4: Enable the product settings block
Completing the following steps will mean that you can configure mixed case settings for Products and Product Variants.
Once installed, edit a Product), then scroll down to the App blocks section and click + App block, then click Tectalic Mixed Wine Cases. Then click the Pin to page for all staff icon.
If your store users Product Variants, click on a Product and then a Product Variant, then scroll down to the App blocks section and click + App block, then click Tectalic Mixed Wine Cases. Then click the Pin to page for all staff icon.
You can now configure your per-product and/or per-variant mixed case rules.
The app block added to the product details screen
Step 5: Configure Per-Product Mixed Case Rules
By default, the products in your store can be purchased in any quantity, so the next step is to configure your product(s) that you want to sell in mixed cases of 6 or 12.
There are two options:
Option A: Your store sells only individual bottles (not whole cases)
In this case, when the customer browses your website, they will add individual bottles to their cart.
So if they want to purchase a whole case of one wine, they would add 12 bottles to their cart. If they want to purchase a mixed case of wines, they add the individual wine varieties to their cart.
Setup steps:
In your Shopify Admin, click on Products. Locate a product that you want to sell in individual bottles (in a mixed case of 6 or 12). Click on the Product to edit it.
Scroll down to the App Blocks section, and configure the Tectalic Mixed Wine Cases settings:
When done, click Save to save the product settings.
Repeat the above steps for any other products that you would like to sell in mixed cases.
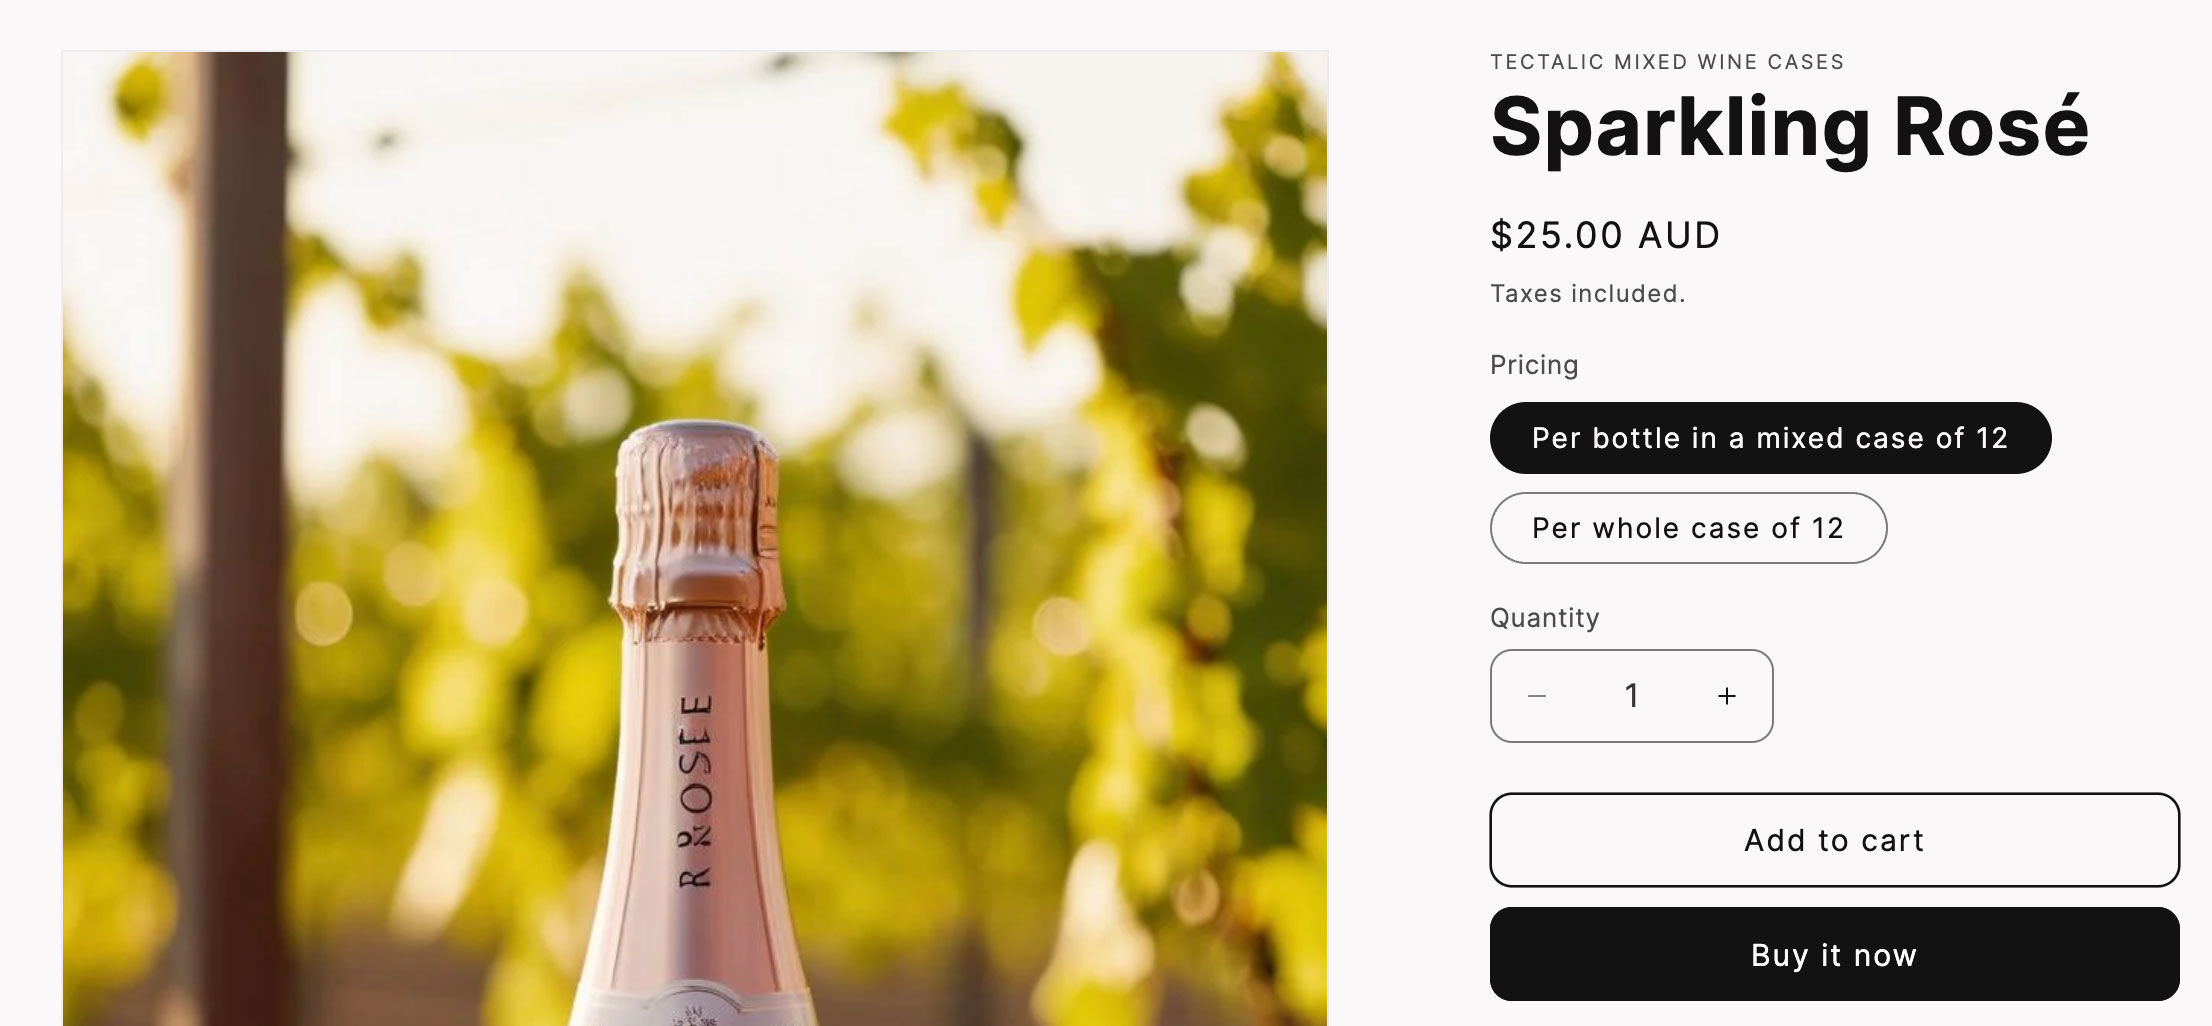
Option B: Your store sells both whole cases and mixed cases
With this setup, when the customer browses your website, they will be offered two purchasing options:
We will use product variants to give your customers these two purchasing choices for each wine.
Setup steps:
In your Shopify Admin, click on Products. Locate a product that you want to sell in both configurations. Click on the Product to edit it.
Scroll to the Variants section, and add a new custom variant called Pricing.
Add the following Option values:
Per bottle in a mixed case of 12
Per whole case of 12
Ensure the price and availability of each variant is correct, then Save the product.
Click on the Per bottle in a mixed case of 12 variant to edit it.
Scroll down to the App Blocks section, and configure the Tectalic Mixed Wine Cases settings:
When done, click Save to save the product variant settings.
Repeat the above steps for any other products that you would like to sell in mixed cases.
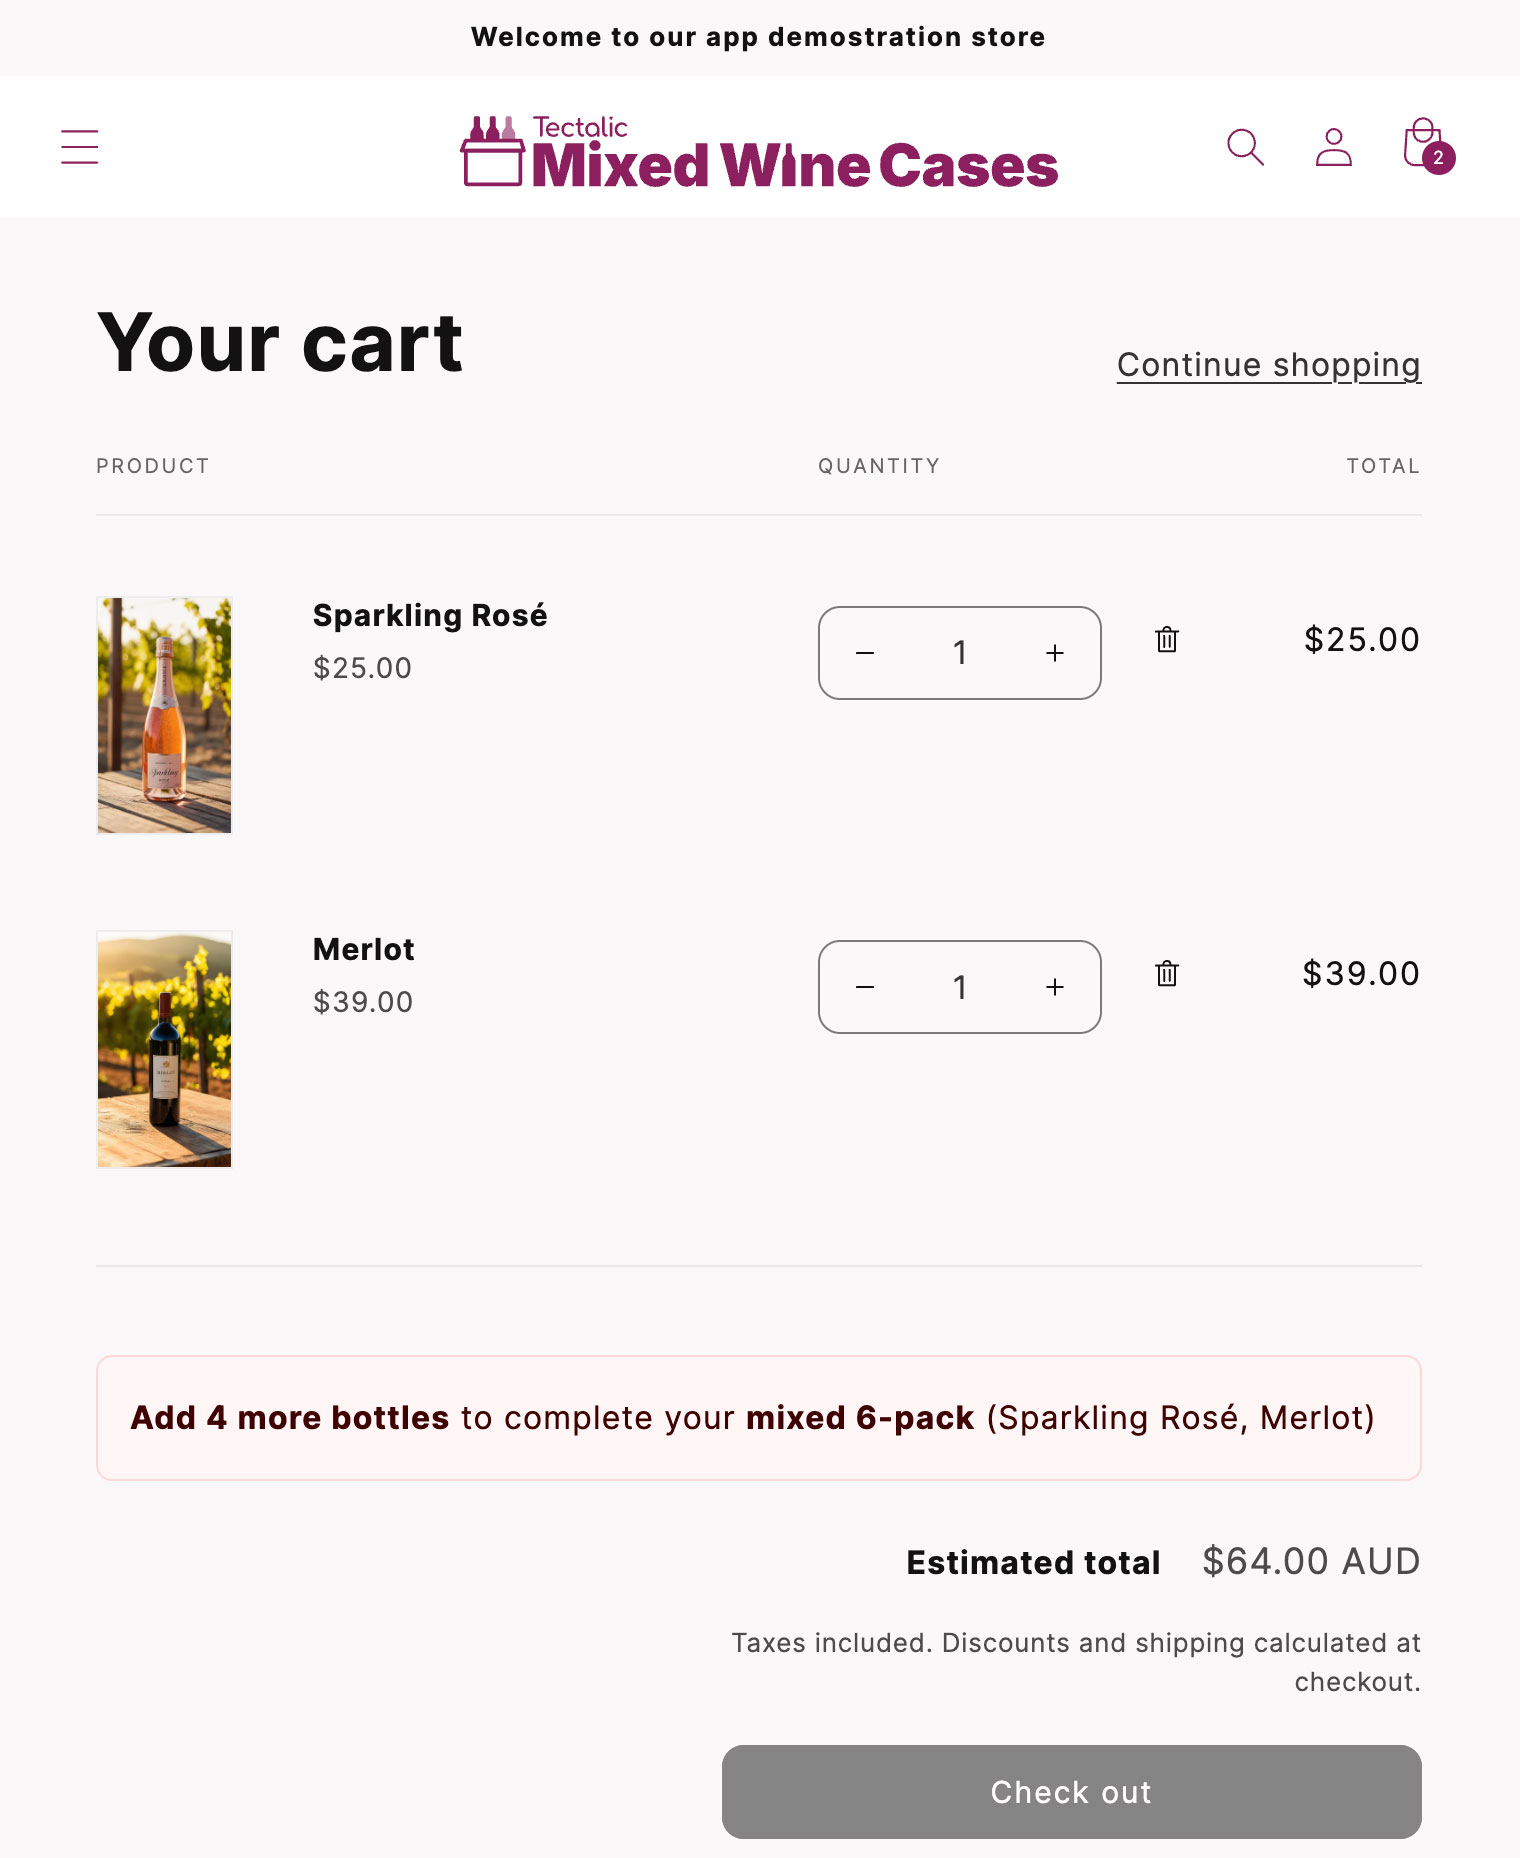
Step 6: Try it out!
Visit your online store, and add one or more bottles to your cart, then proceed to the Cart.
You should see a red message showing you how many more bottles you need to add before being able to check out.
Once your cart contents are correct, then the red error message will disappear and you will be able to check out.
This messaging will also show on the Checkout if your customer proceeds directly to the Checkout.